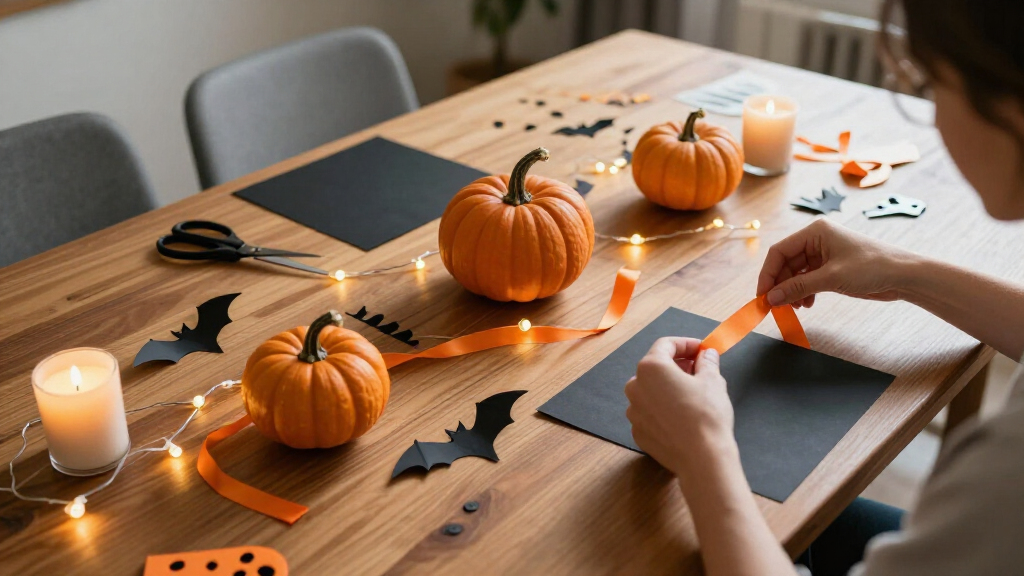
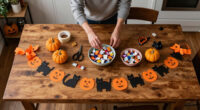
Decorate a home or venue for a Halloween party with a coordinated theme, a welcoming entrance, a clear focal point, and safe, usable guest areas. This guide is for beginners who want a practical setup without specialized tools or elaborate crafting. Allow about 2-4 hours for planning and decorating, not including shopping. You will finish with a room that looks festive in photos, lets guests move comfortably, and has no decorations blocking exits or creating avoidable hazards.

Get the little things that make your day delivered free with Prime
- Fast, free delivery on millions of items
- Prime Video, Amazon Music and more included
- Member-only deals all year

Happy Halloween Decoration Set – Banner, Paper Flower Fans, Circle Garland, Latex Balloons & Swirls
- ✔ Set includes: Letter sign, triangular banner, paper flower fans, balloons, circle garland, and swirls
- ✔ “HAPPY HALLOWEEN” letters: 4.8 x 6 inches
- ✔ Triangular banner letters: 6 inches high

Halloween Bloody Handprint and Footprint Wall and Window Stickers
- ✔ Brand: BANANABROTHER
- ✔ Material: Vinyl
- ✔ Number of sheets: 8

OHOME Halloween Plastic Tablecloths, 2-Pack
- ✔ Pack size: 2 tablecloths
- ✔ Dimensions: 52 x 87 inches
- ✔ Material: Plastic
Difficulty: Beginner | Time: 2-4 hours, plus shopping time
What You’ll Need
Tools & Materials:
- Tape measure or measuring app
- Painter’s tape and removable hooks rated for the surface
- Scissors
- Trash bags and a cloth for cleanup
- Step stool, if needed
Knowledge:
- Basic room setup and decorating skills
- Ability to check product labels and follow lighting or hanging instructions
Gather decorations before setting up: choose a few coordinating colors, such as black and orange, or purple and green. Useful materials include a tablecloth, paper or fabric garlands, window decorations, battery-powered lights, LED candles, and one or two larger props. Check the venue’s rules before attaching anything to walls, ceilings, or doors. Keep real flames, blocked exits, and loose cords out of guest areas.
Happy Halloween Decoration Set – Banner, Paper Flower Fans, Circle Garland, Latex Balloons & Swirls
For hosts who want a recognizable Halloween setup without piecing together several kinds of décor, this is the most versatile starting point in our lineup. The kit combines a “HAPPY HALLOWEEN” sign and triangular banner with flower fans, a circle garland, balloons, and hanging swirls. That variety lets us spread decorations across a wall, doorway, ceiling, or photo area instead of relying on one focal item. Its pre-cut and pre-strung pieces also make it a practical choice when setup time is limited.Compared with the bloody decals, this set offers broader coverage and a less graphic look; it can establish a festive atmosphere without committing the party to a horror scene. The decals, in contrast, bring more menace to glass but do not provide the same mix of room accents. OHOME’s tablecloths are more functional around food and drinks, but cover only the table area. The main compromise here is scale: 12-inch balloons and 8-inch fans may feel modest in a large venue, and a full kit still needs thoughtful placement to look intentional rather than scattered.
Pros:
- Includes several types of décor for walls, doors, ceilings, and photo backdrops
- Pre-cut and pre-strung pieces help simplify installation
- Offers a broader, more flexible look than the horror-specific decals
- Suitable for a range of party settings, indoors or outdoors
Cons:
- The 12-inch balloons may look small in a large venue
- The assortment is less focused than buying a dedicated dramatic backdrop
Best for: Hosts decorating an indoor party room, classroom, bar, or photo-booth area who want several coordinated pieces in one kit.
Not ideal for: Anyone decorating a large hall who needs oversized focal décor, or someone who only wants table protection or a graphic window display.
Bottom line: We rank this first for its mix of coverage, quick setup, and adaptable Halloween styling, while noting that larger spaces may need bigger accents.
“We rank this first for its mix of coverage, quick setup, and adaptable Halloween styling, while noting that larger spaces may need bigger accents.”
Halloween Bloody Handprint and Footprint Wall and Window Stickers
When the party needs a deliberately unsettling detail rather than a general Halloween backdrop, these decals offer the clearest stylistic point of view. The 86 vinyl pieces across eight sheets include bloody handprints and footprints, splatters, drips, scratches, and signs. Used on windows or mirrors, they can make an entryway or room feel like part of a horror scene without taking up floor space or requiring hanging hardware.They are a more specific choice than the Happy Halloween set: the kit is easier to adapt to a mixed-age gathering, while these prints push the room toward graphic horror. They also have a different kind of reach. The broad décor kit can fill several visual zones, but decals are most effective on smooth, visible surfaces; they are not a replacement for banners, hanging accents, or table dressing. Waterproof construction and reusability are useful for seasonal display, though the design may not suit family-friendly events, and the recommended glass-and-mirror surfaces limit where we should plan to apply them.
Pros:
- 86 decals provide plenty of pieces for a layered surface display
- Waterproof vinyl supports indoor and outdoor use
- Reusable design can be peeled away after the event
- More explicitly eerie than the all-in-one decoration kit
Cons:
- Bloody imagery may be unsuitable for children or guests who prefer lighter themes
- Works best on smooth surfaces such as glass and mirrors
- Does not provide the room-wide variety of hanging décor in the leading kit
Best for: Hosts planning a horror-leaning Halloween party who have clear windows, mirrors, or other smooth surfaces to decorate.
Not ideal for: Family-friendly gatherings, understated themes, or rooms where the available walls are textured and there is little glass.
Bottom line: We recommend these when a horror-themed window or mirror scene is the goal, not as a standalone solution for decorating an entire party space.
“We recommend these when a horror-themed window or mirror scene is the goal, not as a standalone solution for decorating an entire party space.”
OHOME Halloween Plastic Tablecloths, 2-Pack
Food and drinks can make a party table the busiest—and messiest—surface in the room. This two-pack gives us Halloween-patterned coverage for 8-foot tables, with pumpkins, skeletons, and bats bringing seasonal color while the waterproof plastic helps guard against spills and scratches. Because each cover can also serve as a photo backdrop, it has more decorating potential than a plain protective layer, although its strongest role remains practical table dressing.Compared with the all-in-one kit, these tablecloths do much less to decorate walls or ceilings, but they address a need the kit does not: protecting the serving area. They are also less theatrical than the bloody decals, which create a horror accent rather than a useful party surface. The tradeoff is material. Lightweight plastic is easy to wipe clean, but it is not as durable or reusable as fabric, and wipe-clean care may not remove every stain. Choose this pack for convenience and coverage, not for a lasting table textile.
Pros:
- Two covers provide options for multiple tables or a spare
- 52-by-87-inch size is intended for an 8-foot rectangular table
- Waterproof plastic helps protect against spills and scratches
- Can double as a photo backdrop and wipes clean for convenient handling
Cons:
- Plastic is less durable than a reusable fabric table cover
- Wiping may not remove every stain
- Decorates the table area rather than providing broad room coverage
Best for: Hosts serving food or drinks at an 8-foot table who want Halloween styling alongside spill and scratch protection.
Not ideal for: Buyers seeking durable fabric covers, a whole-room decoration solution, or a surface treatment with a graphic horror effect.
Bottom line: We place this third because it is a useful, low-effort table solution, but it has a narrower decorating role than the room-wide kit or the decals.
“We place this third because it is a useful, low-effort table solution, but it has a narrower decorating role than the room-wide kit or the decals.”
As an Amazon Associate we earn from qualifying purchases.
Before You Start
Decide which rooms guests will use and how many people you expect. Measure the entrance, main gathering area, buffet or drink station, and any narrow walkways. Plan decorations around furniture and doors rather than moving everything after setup. If children or pets will attend, avoid small detachable pieces, breakable props, and decorations they can pull down. Test battery lights before hanging them, and keep packaging or care instructions available for any electrical products.
Step-by-Step Instructions
Step 1: Choose a clear Halloween theme
Pick one theme and limit the main palette to two or three colors. Examples include classic haunted house, friendly pumpkins, gothic black-and-purple, or spooky woodland. Write down the theme, colors, and the mood you want guests to feel. Use this short plan when selecting decorations so the room does not become a mix of unrelated styles.
Tip:Use existing neutral furniture as part of the display rather than buying matching items for every surface.
Check: You can describe the theme in one sentence and identify the colors you will repeat.
Step 2: Map guest areas and walking routes
Mark the entrance, coat or bag area, seating, food and drinks, and the main gathering spot. Walk the route guests will take between them. Leave doors, stairs, and exits unobstructed, and keep a comfortable passage between furniture. Reserve one visible wall, table, or mantel as the main photo or display area.
Tip:Do not put props where people will turn suddenly, carry plates, or step off stairs. Tape down or reroute cords before decorating around them.
Check: A person can enter, reach food, and leave without squeezing past decorations or stepping over cables.
Step 3: Sort decorations by location
Group decorations into entrance, focal point, food area, and background lighting. Set out only the items that fit the theme. Start with large pieces, such as a backdrop or table covering, then add smaller accents. Leave some open surfaces so the room remains usable and the main decorations are easy to see.
Tip:Use a small number of large, coordinated pieces instead of covering every wall and table with unrelated items.
Check: Each decoration has a planned location, and food, seating, and serving space remain available.
Step 4: Prepare the entrance
Decorate the approach and doorway with a wreath, a lightweight garland, a window cling, or a small sign. Attach items with removable hooks or tape that suits the surface. Keep the door handle, hinges, door closer, and full door swing clear. If the entrance is outdoors, choose weather-resistant decorations and secure them against wind.
Tip:Do not hang fabric or paper where it could cover a porch light, touch a heater, or catch on a door.
Check: The doorway signals the party theme, opens fully, and has no loose decoration underfoot.
Step 5: Create the main focal point
Set up the photo wall, mantel, or central display using the largest decorations first. Add a backdrop or garland, then arrange a few supporting props at different heights. Place breakable or top-heavy items where guests cannot bump them. Keep the display away from heat sources and do not block smoke alarms, sprinklers, or ventilation.
Tip:Take a quick photo from the guest viewpoint. Adjust crowded or uneven areas before adding more items.
Check: The display reads clearly from across the room and gives guests a suitable place for photos without blocking circulation.
Step 6: Decorate food and drink stations
Cover the serving table with a clean, theme-colored cloth and add a few washable or disposable accents around the edges. Keep decorations away from food, drink containers, serving utensils, and hot dishes. Leave enough open room for plates and guests to serve themselves. Place a small sign or label where it will not interfere with serving.
Tip:Keep loose glitter, faux cobwebs, and shedding decorations away from uncovered food.
Check: Guests can set down a plate, reach each item, and serve themselves without moving a prop.
Step 7: Add safe, layered lighting
Use the room’s normal lighting as a base, then add battery-powered string lights, LED candles, or a shaded lamp to create atmosphere. Test every light and follow its product instructions. Route cords along walls, secure them where permitted, and keep plugs and connections away from drinks and high-traffic paths. Use only decorations rated for the location if setting up outside.
Tip:Avoid making stairs, doorways, and serving areas so dark that guests cannot see steps or obstacles. Do not use candles near paper, fabric, or synthetic webbing.
Check: The room has a Halloween mood, but guests can see faces, food, floor changes, and exits.
Step 8: Check the room from a guest’s view
Walk from the entrance through every guest area while carrying a plate or bag. Look for low-hanging decorations, sharp edges, unstable props, loose cords, blocked signs, and items that could fall if brushed. Sit in the main seating area and check whether the focal point is visible. Remove or reposition anything that interferes with movement or safe use of the room.
Tip:Ask another adult to do the same walk-through; a second person may spot hazards hidden by the setup.
Check: All routes are passable, decorations are stable, and the party’s main areas work as intended.
Common Mistakes to Avoid
- Buying many decorations before choosing a theme. — Choose the palette and mood first, then select pieces that support them. Reuse decorations you already own and leave out items that clash.
- Crowding doorways, stairs, or the food table with props. — Plan guest routes before decorating and keep clear space around doors, stairs, exits, and serving surfaces. Walk the routes after setup.
- Using open flames or unsecured cords near decorations and guests. — Choose LED candles and battery-powered lights where possible. Keep cords away from walkways and follow the light’s product instructions.
- Using adhesive or hanging methods that damage walls or let decorations fall. — Check surface compatibility and hook weight ratings, test a small area, and avoid hanging heavy items from lightweight tape.
Troubleshooting
Problem: Removable tape or hooks are coming loose.
Solution: Remove the decoration, clean and dry the surface if the product instructions allow, and use a fastening method rated for that surface and item weight. Put heavy decorations on furniture or a freestanding stand instead.
Problem: The room feels cluttered or the theme is hard to see.
Solution: Remove small accents first. Keep the focal point and a few repeated colors, then clear tabletops and walkways. Take a photo to see whether one area is drawing too much attention.
Problem: String lights do not work after installation.
Solution: Switch them off, check the batteries or plug connection, and inspect the product instructions for a reset or fuse check. Replace damaged lights; do not use frayed wires or exposed connections.
Problem: Guests cannot move comfortably around the setup.
Solution: Move props against walls, widen the path between furniture, and relocate the food station if needed. Remove any decoration that still narrows a doorway, stair, or exit route.
What Success Looks Like
The finished room has a recognizable Halloween theme, a welcoming entrance, one clear focal display, and appropriately decorated guest areas. Guests can reach seating, food, and exits without moving decorations or stepping over cords. Lights work, props are stable, serving surfaces are usable, and the space remains bright enough for safe movement.
Next Steps
Before guests arrive, switch on the lights, check the entrance and routes once more, and move fragile items out of reach. Keep spare batteries, removable fasteners, and a small cleanup bag nearby. After the party, switch off and unplug lights according to their instructions, remove adhesive carefully, separate reusable decorations from disposable items, and store reusable pieces in labeled containers for next year.
Frequently Asked Questions
How early should I put up Halloween party decorations?
For an indoor party, set up a few hours beforehand so you can test lighting and make changes without rushing. Put up delicate paper decorations close to the event if pets, children, or household activity could damage them.
How can I decorate on a small budget?
Repeat two or three colors, use a tablecloth or sheet as a backdrop, and focus spending on one visible centerpiece. Paper cutouts, window clings, and decorations already in your home can fill smaller areas without crowding the room.
Can I use real candles in Halloween decorations?
LED candles are the safer choice around guests, paper, fabric, and synthetic cobwebs. If real candles are permitted and used, keep them in stable holders, away from anything that can burn, and never leave them unattended.
How do I decorate when children or pets will be at the party?
Keep small pieces, breakable props, cords, and hanging decorations out of reach. Avoid items that shed fibers or have sharp points, and choose stable decorations that cannot easily tip or be pulled down.